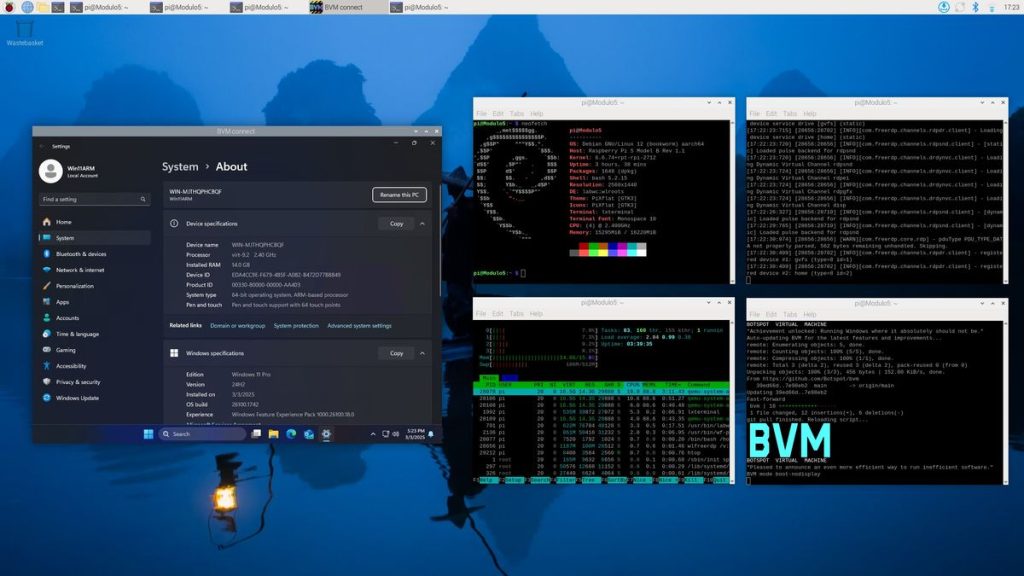
Botspot has developed a method to install Windows 11 on a Raspberry Pi using their Botspot Virtual Machine (BVM). This approach promises a more straightforward installation process, primarily facilitated through terminal commands, with an optional graphical user interface (GUI) for users who prefer a more visual setup.
System Requirements
To successfully run this project, the following specifications are necessary:
- A Raspberry Pi 5 with at least 4GB of RAM, running Raspberry Pi OS.
- An NVMe SSD and a compatible PCIe HAT board, with a minimum of 50GB of free space.
- Active cooling for optimal performance.
Installation Steps
Follow these steps to install and configure Windows 11 on your Raspberry Pi:
- Clone the BVM repository: Open a terminal and execute the following command:
git clone https://github.com/Botspot/bvm - Initialize BVM: Run the command to install all necessary dependencies:
bvm/bvm help - Create a configuration for Windows 11:
bvm/bvm new-vm ~/win11 - Download Windows 11: Fetch the Windows 11 files and necessary drivers:
bvm/bvm download ~/win11 - Prepare the installation:
bvm/bvm prepare ~/win11 - Boot Windows 11 for the first time: This process will automate the installation, so it may take some time:
bvm/bvm firstboot ~/win11 - Run the VM in headless mode: This option improves performance:
bvm/bvm boot-nodisplay ~/win11 - Connect to Windows 11: Use a remote desktop connection to access your Windows 11 environment:
bvm/bvm connect ~/win11 - Shutdown Windows 11 safely: Use standard procedures to power down the OS.
Using the GUI
If you prefer a GUI over terminal commands, execute the following command to open the BVM interface:
bvm/bvm guiThis interface simplifies the command steps while operating under the same functions.
USB Device Passthrough
Connecting external USB devices to your Windows 11 VM enhances functionality. Follow these steps:
- Ensure that BVM and the Windows 11 VM are powered down.
- Connect the USB device to the Raspberry Pi.
- List connected USB devices:
lsusb - Identify your device ID, then open the config file:
nano ~/win11/bvm-config - Update the
usb_passthroughentry with the copied device ID. - Save the changes by pressing CTRL+X, then Y, and Enter.
- Restart the Windows 11 installation in headless mode and connect via RDP to access the USB device within the VM.
Mounting the Windows 11 Drive
To facilitate file transfers between the Raspberry Pi OS and Windows 11, mount the VM drive as follows:
- Execute the mount command:
bvm/bvm mount ~/win11 - Access the mounted drive via the Raspberry Pi OS file manager at
/media/pi/bvmmountto read and write files. - Unmount the drive using the “eject” button in the file manager, then restart the Windows 11 VM as needed.
By following these instructions, users can effectively run Windows 11 on a Raspberry Pi 5, managing both installations and configurations efficiently. The integration of USB devices and file management facilitates a smoother experience across operating systems.

